

For anyone embarking on a journey with Viking Cruises, whether it’s a serene river cruise through Europe or an expansive ocean voyage, My Viking Cruise login is your personalized portal to a seamless and enriched travel experience. Far more than just a booking summary, this dedicated online platform, often referred to as My Viking Journey, empowers you to take control of your upcoming adventure, ensuring every detail is perfectly tailored to your preferences before you even step aboard. Get ready to unlock a world of planning tools, exclusive features, and essential travel information, all designed to enhance your pre-cruise excitement and simplify your preparations.
Welcome to the ultimate guide on Viking Cruises login. In this article, we will cover everything you need to know about logging into your Viking Cruises account. We will also discuss the benefits of having an account and how to troubleshoot common login issues.
Why You Need a Viking Cruises Account
Having a Viking Cruises account can make your travel experience more enjoyable and convenient. Here are some reasons why you need an account:
- Access to exclusive deals and offers
- Manage your bookings easily
- Receive important updates and notifications
- Personalize your travel experience
How to Create a Viking Cruises Account
If you don’t have an account yet, follow these simple steps to create one:
- Visit the Viking Cruises website.
- Click on the “Sign Up” button.
- Fill out the registration form with your details.
- Submit the form and verify your email address.
Step-by-Step Guide to Viking Cruises Login
Accessing your personalized MyVikingJourney.com account is a simple process designed to help you manage and enhance your Viking cruise experience. Whether you’re making your final payment, booking shore excursions, or reviewing flight details, the steps are straightforward.
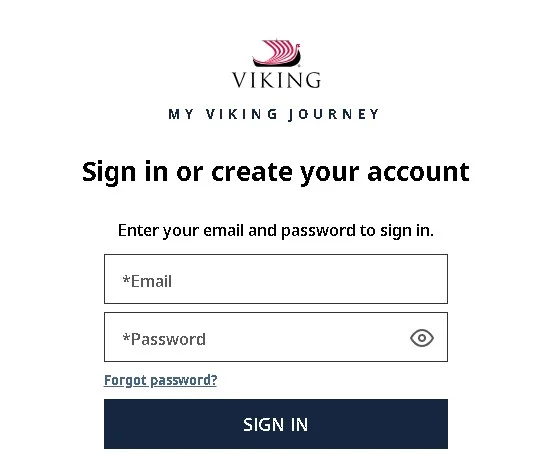
Here’s how to log in to MyVikingJourney.com:
- Go to the MyVikingJourney.com Website: Open your web browser and navigate directly to MyVikingJourney.com. This is the official portal for managing your Viking cruise.
- Locate the Login Form: On the homepage, you’ll find the login area. It typically asks for your credentials.
- Enter Your Email Address and Password:
- In the designated fields, type in the email address you used when you booked your Viking cruise or created your My Viking Journey account.
- Enter your corresponding password.
- Click “Log In” or “Sign In”: After entering your details, click the “Log In” or “Sign In” button to proceed.
- Access Your Dashboard: Once successfully logged in, you will be directed to your personalized dashboard. From here, you can:
- Manage your booking details
- Complete your Guest Information Form (GIF)
- Make and schedule payments
- Browse and book shore excursions
- Review and manage flights (if booked through Viking Air)
- Access and print important travel documents
- Explore ship details and deck plans
- View FAQs
What if you don’t have an account or forgot your password?
- Creating an Account: If this is your first time using My Viking Journey and you haven’t set up an account yet, look for a “Sign Up” or “Create Account” option on the login page. You’ll typically need to provide some basic information, including the email associated with your booking, and create a password. You may also need your booking number to link your cruise.
- Forgot Password?: If you’ve forgotten your password, click the “Forgot Password?” link usually located near the login fields. You’ll then be prompted to enter your email address to receive instructions on how to reset your password.
- Two-Factor Authentication (2FA): Be aware that Viking has implemented enhanced security measures, which may include two-factor authentication (2FA). If prompted, you might need to enter a verification code sent to your email or phone after entering your password.
By following these steps, you should be able to access your MyVikingJourney.com account and make the most of your pre-cruise planning.
How to Sign Up for an Account on MyVikingJourney.com
Signing up for an account on MyVikingJourney.com is a straightforward process, especially once you have a Viking cruise booking. This portal is designed to help you manage all aspects of your upcoming voyage.1
Here’s a step-by-step guide on how to sign up:
- Visit the MyVikingJourney.com Website:Open your web browser and go directly to MyVikingJourney.com. This is the official gateway for guests to manage their bookings.2
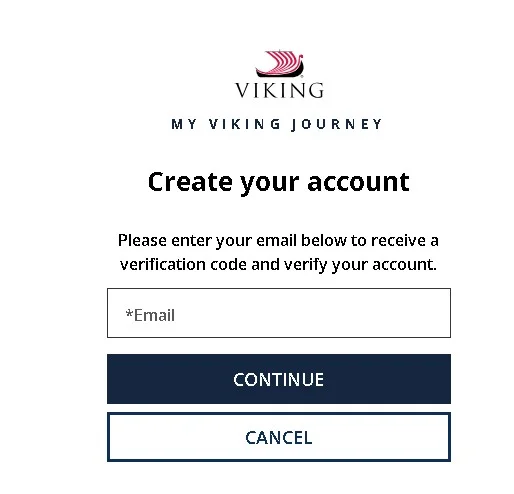
- Look for “Sign Up” or “Create Account”:On the homepage, typically near the login fields, you’ll find an option that says something like “Sign Up,” “Create Account,” or “Sign in or create your account.” Click on this link.
- Provide Required Information:The system will prompt you to enter some essential details to create your account. This usually includes:
- Email Address: Use the email address that is associated with your Viking cruise booking. This is crucial for linking your account to your reservation.
- Password: Create a strong password for your account. It’s recommended to use a combination of uppercase and lowercase letters, numbers, and symbols.
- Confirm Password: Re-enter your chosen password to confirm it.
- Your Name: Your first and last name, as they appear on your Viking booking.
- Link Your Booking (If Prompted):After creating your basic account, you will likely be asked to link your cruise booking to your new My Viking Journey account. You will need your Viking cruise booking number for this step. Enter it in the designated field.
- Complete the Account Creation:Follow any final prompts, which might include agreeing to terms and conditions or verifying your email address (Viking may send a confirmation email to the address you provided).
- Access Your Dashboard:Once your account is successfully created and linked, you will be taken to your personalized My Viking Journey dashboard. From here, you can immediately begin to:
- Complete your Guest Information Form (GIF)
- Make payments
- Book shore excursions
- Review flight details (if booked through Viking Air)
- Access important travel documents
- And much more to prepare for your cruise!
Important Notes:
Customer Support: If you encounter any issues during the sign-up process, don’t hesitate to contact Viking Cruises customer service. They can assist you with account creation and linking your booking.
Booking is Key: You typically need an existing Viking cruise booking to create and fully utilize a My Viking Journey account, as the portal is designed to manage specific reservations.
Navigating My Viking Journey: Challenges and Solutions
Navigating My Viking Journey (MVJ) can initially present challenges due to its less intuitive design. While it may not feel user-friendly at first, users generally find it becomes easier to navigate with use. Understanding these potential hurdles can help you streamline your experience on the platform.
Common Login Issues and How to Fix Them
Sometimes you might face issues while logging in. Here are some common problems and their solutions:
Forgot Password
If you forgot your password, follow these steps:
- Click on the “Forgot Password” link on the login page.
- Enter your email address and click “Submit”.
- Check your email for a password reset link.
- Click the link and follow the instructions to reset your password.
Incorrect Email Or Password
If you see an error message saying your email or password is incorrect:
- Make sure you are entering the correct email address.
- Check for any typos in your email or password.
- Ensure that your Caps Lock is off.
Account Locked
If your account gets locked after multiple failed login attempts:
- Wait for 15 minutes before trying again.
- Contact customer support for assistance.
Forgot Username
To reset a forgotten username on a travel website, follow these straightforward steps:
- Visit the Website: Head to the website’s main page using your internet browser.
- Access the Login Page: Look for the login section. You’ll typically find this portal on the homepage or under the account or profile menu.
- Find the Username Recovery Option: Locate the “Forgot your username?” link or a similar option. This is generally placed beneath the login fields.
- Provide Necessary Details: You’ll need to fill out a form with your personal information. Usually, this includes your first and last name, reservation or booking number, and departure date.
- Proceed with the Process: After entering the information accurately, hit the “Next” or “Submit” button to proceed.
- Follow Email Instructions: You will receive an email with a link or instructions to help you reset your username. Follow those steps to complete the process.
By following these steps, you will be able to recover access to your travel account efficiently. Remember, while navigating MVJ might seem challenging at first, these practical solutions and a bit of patience can significantly enhance your user experience.

Benefits of Logging into Your Viking Cruises Account
Once you log into your account, you can enjoy several benefits that enhance your experience and simplify your travel management:
Account Dashboard
Upon logging in, you’ll land on your account dashboard. Here, you can instantly view your recent activity, manage your account settings, and more.
Manage Bookings
You can easily view and manage all your bookings in one place. This includes making changes to your itinerary and adding special requests.
To find the option for adding a booking number in My Viking Journey, navigate to the top right corner of the webpage. There, you’ll see your name displayed. Click on it, and you’ll find an option to add your booking number. This will ensure your travel details are seamlessly integrated into your online journey planner.
How to Add a Second Booking Number to Your My Viking Journey Account
Adding a second booking number to your My Viking Journey account is a straightforward process. Follow these steps to ensure everything is correctly linked:
- Sign In to Your Account: Begin by logging into your My Viking Journey account. You’ll find the sign-in option on the upper right corner of the homepage.
- Access Your Profile: Once logged in, locate your profile name in the top right area. Clicking on this will reveal a drop-down menu with several options.
- Locate Booking Options: Within the menu, look for the option that allows you to manage or add booking numbers. This feature is designed to help you personalize your travel plans easily.
- Enter the New Booking Number: Select the option to ‘Add a Booking Number.’ You’ll then be prompted to input your new booking number. Ensure you type it correctly to avoid any issues with the system recognizing your reservation.
- Save Changes: After entering the booking number, confirm the action to save your changes. This will update your account with the new information, allowing you to view and manage multiple bookings conveniently.
By following these steps, you can efficiently manage multiple bookings within your My Viking Journey account. Enjoy the added flexibility of having all your reservations organized in one place!
Access All Features
Being logged in gives you full access to the site’s features, including booking travel and managing your itinerary efficiently.
Exclusive Offers
As a logged-in user, you get access to exclusive deals and offers that are not available to others.
Receive Notifications
Stay updated with important notifications about your travel plans. This includes changes in schedules and special announcements.
Personalization
Get personalized recommendations and offers based on your travel preferences and history, ensuring a tailored experience every time you visit.
Comprehensive Management
From the dashboard, you can also manage your account settings, ensuring your information and preferences are always up-to-date.
How It Works
- Log In: Access your account to begin tailoring your travel experience.
- Explore Options: Discover a variety of trips and destinations that match your interests.
- Plan Your Journey: Use intuitive tools to schedule and organize your itinerary.
By logging in, you’ll gain access to a personalized dashboard where you can effortlessly manage every aspect of your trip. This ensures that your travel plans are not only convenient but also uniquely suited to your desires.
What Do You Need to Log In and Get Travel Updates?
To ensure you can seamlessly log in and receive updates on your chosen travel website, make sure you have the following essentials:
- Reliable Internet and Browser:
- A stable internet connection is crucial for uninterrupted access.
- Use modern web browsers such as Google Chrome, Mozilla Firefox, or Safari for optimal performance.
- Compatible Device:
- Any of your go-to gadgets will work, whether it’s a PC, smartphone, or tablet.
- Account Credentials:
- Have your username and password ready for a smooth login process.
- Access to the Travel Site:
- Be sure you’ve bookmarked or can easily navigate to the site’s homepage for convenience.
Equipped with these basics, you’ll be all set to stay updated on the latest travel news and opportunities.
Options for Booking Shore Excursions and Accessing Essential Documents
Booking shore excursions and accessing critical travel documents is now more convenient than ever. Here’s how you can manage these tasks with ease:
- Online Platforms: Utilize travel websites and online booking systems where you can explore and arrange your shore excursions. These platforms often provide detailed itineraries, user reviews, and availability, allowing you to customize your adventure from the comfort of your home.
- Travel Apps: Download dedicated travel apps on your smartphone or tablet. These apps often offer features to reserve shore excursions, make special requests, and keep all your essential travel information in one place.
- Email Notifications: Subscribe to newsletters or alerts from travel providers. They frequently send personalized recommendations and updates on available excursions, along with direct links to access related documents.
- Customer Service Support: If you prefer a more personal touch, you can contact customer support centers, where representatives can assist in booking excursions and ensuring you have all the documentation you need.
By leveraging these options, you can seamlessly plan your excursions and keep your necessary travel documents organized and accessible.
Essential Security Measures for Protecting Your MyVikingJourney.com Account
Ensuring the safety of your MyVikingJourney.com account starts with securing your device. Here’s how:
- Strong Password: Create a robust password that combines upper and lowercase letters, numbers, and special characters. Avoid using easily guessed information, such as birthdays or common words.
- Sign Out After Use: Always log out of your account after each session. This prevents unauthorized access, especially on shared or public devices.
- Update Security Software: Keep your security software current. Regular updates help safeguard against new threats, like malware and viruses, that could compromise your account details.
By following these steps, you can protect your account and personal information effectively.
When managing multiple cruise bookings, it’s not necessary to create separate logins for each booking number. Most platforms allow you to consolidate your bookings under a single account for ease of access.
Here’s how you can typically manage multiple bookings:
- Access Your Account: Login to your existing account using your credentials.
- Locate the Option to Add Bookings: Navigate to the account settings or dashboard, usually found in the upper section of the page where your account name is displayed.
- Enter the Additional Booking Number: Look for an option to add or link another booking number. Enter the required information for additional bookings.
- Confirm: Follow the on-screen instructions to confirm that the booking has been added successfully.
By consolidating your bookings, you’ll have all your travel details in one place, making it easier to manage your travel itinerary and preferences.
Limitations of My Viking Journey: Account Visibility and Payment Tracking
Navigating My Viking Journey becomes more manageable over time, though its interface may not feel immediately intuitive. However, one notable limitation surfaces when dealing with third-party travel agents for booking purposes.
If you opt to use a travel agent, you’re unable to view your personal account details directly on the platform. This restriction extends to payment tracking as well. While you aren’t required to handle payments related to the cruise portion directly, it would be beneficial to at least have visibility over the payments made and any outstanding amounts.
In summary, while My Viking Journey serves its intended purpose, its limitations in account accessibility and payment transparency can be frustrating for users relying on travel agents.

FAQs About Viking Cruises Login
Here are some frequently asked questions about Viking Cruises login:
Can I Use My Social Media Account To Login?
Currently, Viking Cruises does not support login via social media accounts. You need to use your registered email address and password.
Is My Personal Information Safe?
Yes, Viking Cruises takes your privacy seriously. They use advanced security measures to protect your personal information.
Can I Change My Email Address?
Yes, you can change your email address in your account settings. Make sure to verify the new email address to complete the change.
To access your account using multiple booking numbers, follow these steps:
Sign In: Begin by logging into your account with your initial booking number.
Locate Profile Options: Once logged in, navigate to the upper right corner of the page where your profile name appears.
Add a Booking Number: Within the dropdown menu, select the option to manage or add a new booking number.
Enter Additional Bookings: Enter the second cruise’s booking number into the designated field.
Confirm and Save: Ensure that the information is correctly entered and then save your changes to link all your bookings.
By following these simple steps, you can manage multiple cruise bookings seamlessly, keeping your travel plans organized and easily accessible.
Contact Viking Cruises Customer Support
If you need further assistance, you can contact Viking Cruises customer support:
- Phone: 1-800-304-9616
- Email: [email protected]
- Live Chat: Available on the Viking Cruises website
How To Access Viking Cruises Login?
Visit the Viking Cruises website. Click on the ‘Log In’ button at the top right corner.
What To Do If I Forget My Password?
Click on ‘Forgot Password’ on the login page. Follow the instructions to reset your password.
Can I Change My Viking Cruises Password?
Yes, log in to your account. Go to ‘Account Settings’ and select ‘Change Password’.
Can I Change the Date of My Viking Cruise?
Yes, you can change the date of your Viking cruise, but it depends on the specific cruise itinerary and Viking’s policies. Date changes may be subject to availability and change fees. It’s best to contact Viking Cruises directly or your travel agent as soon as possible to request a date change.
Is Viking Cruises Login Secure?
Yes, Viking Cruises uses advanced encryption to ensure your personal information is secure.
To further safeguard your MyVikingJourney.com account, consider these additional steps:
- Use a Strong Password: Create a password that is difficult for others to guess. Avoid common words or sequences and opt for a mix of letters, numbers, and symbols.
- Log Out After Use: Always log out of your account when you’re finished, especially if you’re using a shared or public device. This prevents unauthorized access.
- Keep Software Updated: Ensure your computer or device is running the latest security software. This helps protect against malicious software or viruses that could compromise your account.
By combining Viking Cruises’ robust encryption with these personal security practices, you can significantly enhance the safety of your account.
Can I Change the Date of My Viking Cruise?
Yes, you can change the date of your Viking cruise, but it depends on the specific cruise itinerary and Viking’s policies. Date changes may be subject to availability and change fees. It’s best to contact Viking Cruises directly or your travel agent as soon as possible to request a date change.
How Do I Pay for Viking Cruises Online?
You can pay for your Viking cruise online through Viking Cruises’ official website by logging into your account. They accept various payment methods including credit/debit cards and bank transfers. Viking also offers payment plans that allow you to pay in installments.
How Do I Cancel a Viking Cruise Online?
To cancel your Viking cruise online, log into your Viking Cruises account and follow the cancellation steps provided. Keep in mind cancellation policies vary by booking, and fees may apply depending on how close you are to the departure date. For assistance, you can also contact Viking customer service directly.
Does Viking Offer Free Excursions?
Viking offers a selection of included shore excursions as part of many cruise packages, but not all excursions are free. Some specialty or optional excursions may come with an additional cost. Always check your specific cruise itinerary to see which excursions are complimentary.

Conclusion
Logging into your Viking Cruises account is simple and offers many benefits. Follow the steps mentioned above for a smooth login experience. If you encounter any issues, refer to the troubleshooting tips or contact customer support. Enjoy your journey with Viking Cruises!
